First things first. Before you can become a GA power user you need to have created a GA account and set it up properly on your website. This blog post will outline a step by step process to implement GA on your site. This in not an exhaustive checklist, but one that will get you up and running so that you can become a power user. If you are a marketer reading this post you may want to quickly read this post and then schedule some time with your IT person to go over the list and see if anything was missed.
Step 1: Understand the Website
Step 2: Analyze The Website
Step 3: Create a Google Analytics Account
Step 4: Create and Configure Profile(s)
Step 5: Setup Internal Traffic Filter
Step 6: Add Tracking Code to Website
Step 7: Link Google Analytics Account to AdWords Account (if applicable)
Step 8: Setup Goals and Funnels
Step 9: Configure E-Commerce Tracking (if applicable)
Step 10: Configure Site Search (if applicable)
Step 11: Tag Advertising Links
Step 12: Create/Update Privacy Policy
Step 13: Test on a Development Server (whenever possible)
Step 14: Setup Filters
Step 15: Implement on live site
Step 16: Review and Update
Step 17: Grant Access to Other Users
Step 18: Setup Scheduled Reports
If you don’t have Google Analytics setup on your site, and you feel you need some help, contact us about our GA Setup service. If you already have GA on your site, but you feel that it isn’t setup properly contact us to learn more about our GA Audit service.

click for the full image
Step 1: Understand your Website
Ask yourself such questions as:
- Why does my website exist?
- What do I want my visitors to do?
Answers to questions like these will help you to determine what your sites goals are and define your key metrics (KPI’s)
Step 2: Analyze The Website
Does your website have any of the following:
- Large amount of traffic – If your site gets 200k+ visits or 500k+ pageViews in a week then consider sampling your data collection instead of collecting data on every visit
- Crosses Multiple Domains and Sub-Domains – If your site crosses multiple domains or sub-domains you will need to update your code as per Google’s documentation.
How do I install the tracking code if my site spans multiple domains?
How do I track all of the subdomains for my site in one profile?
- Has Non-HTML Pages – If your site has .pdf, .wmv, or other non-html based files that you would like to track, you’ll need to tag these items so that they can be tracked.
- Is Dynamically Created – If your site is dynamically created, you may need to exclude query string variables that hold no relevance to the reporting. If the site uses session IDs in the URL or other customer identifying information, these need to be identified so they can later be removed via the Exclude URL Query Parameters section of the profile.
- Uses Frames – The Google Analytics tracking code will need to be placed in the section of the parent HTML file and also any child HTML pages. Without careful implementation you could see inflated visitor numbers and lose referring source information.
- Uses Flash – There is a brand new flash component that installs right into the Flash IDE and this should be used for tracking Flash content for the best results:Google Analytics Tracking for Adobe Flash
Step 3: Create a Google Analytics Account
If you don’t already have a GA account, it is really quick and easy to set one up. Just visit the following link and and enter your email address and create a password: http://twurl.nl/6qg7ad
Step 4: Create and Configure Profile(s)
- You can create up to 50 profiles per account.
Profiles you want to setup:
- Master Profile. A master profile should be created for each website. This will contain live data with only pre-tested filters.
- Live Test Profile. Same URL as Master Profile. This contains live data like the master account, but is the profile where all new filters are first tested for a period of time before being added to the master profile.
- No Filter Profile. Same URL as Master Profile with no filters applied. This will act as a fall back for information to validate filters, etc.
- Dev Profile. This profile is only run on the development site to test site updates and ensure that the analytics data is getting sent to Google properly before putting site updates live. Use a hostname filter to include only dev site traffic.
- Ensure that you have specified a default page for each profile (ex. index.html) so that the domain (www.mysite.com) and home page (www.mysite.com/index.html) do not get tracked separately.
- Set the Time Zone. If the user has an Adwords Account, use the Adwords account timezone. Otherwise, use the client’s location as the time zone.
- Add any URL variables that you don’t want showing in your reports to the Exclude URL Query Parameters field (session id’s, etc)
- If the site will track e-commerce transactions, then enable e-commerce tracking in each profile.
- If the site has an internal search engine, then enable site search tracking in each profile.
- If AdWords is being used, be sure to link the AdWords account to the appropriate profiles and activate the “Apply Cost Data” setting via the AdWords interface. AdWords accounts are linked to profiles not to GA accounts.
Step 5: Setup Internal Traffic Filter
You will likely want to filter out traffic to your website that is generated by your agency and your employees. You may even want to add this data to its own profile.
Step 6: Add Tracking Code to Website
Insert tracking script on all the pages you wish to track by doing the following:
- For standard installations, the tracking script should be included right before the closing body tag.
]]>
Step 7: Link Google Analytics Account to AdWords Account (if applicable)
If you setup your analytics account from AdWords, this should already be done. If not, login to the AdWords account, click the Analytics tab, and click “Link It To Your AdWords Account” near the bottom of the page.
More information on this can be found here:
How do I link my Google Analytics account to my AdWords account 1
How do I link my Google Analytics account to my AdWords account 2
*leave auto-tagging enabled
It’s also important to login to your analytics profiles and be sure that “Apply Cost Data” is ticked.
- You must link each and every profile you wish to track Adwords data on
- Adwords account must have administrator access to profiles
- To link an Adwords account, under Analytics tab, click “Edit” for the profile you want to link. Set “Apply Cost Data” to “yes”
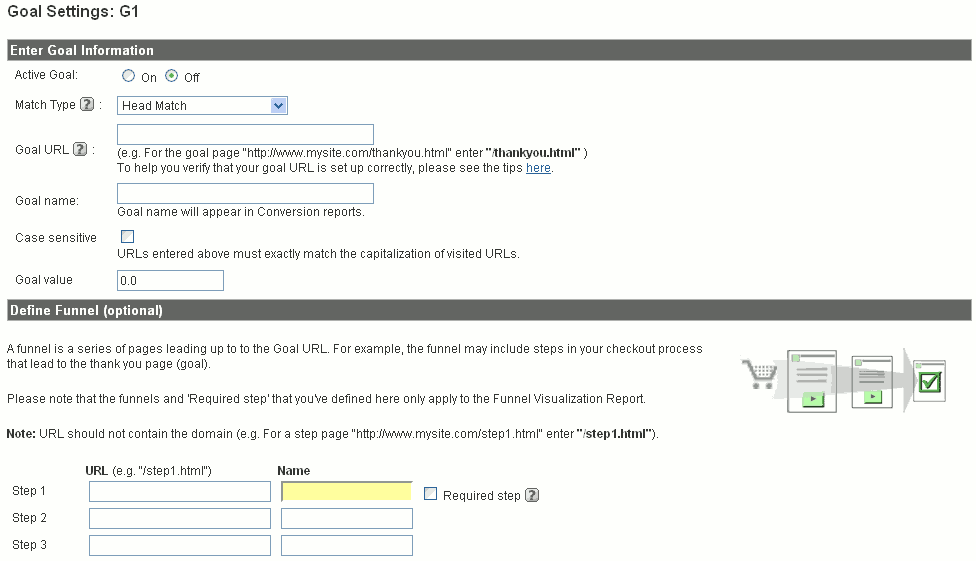
Step 8: Setup Goals and Funnels
- Define the actions you want users to complete on the site.
- Identify ‘Goal Pages’ for those actions.
- Identify the Funnel pages, if applicable
- Be sure you have identified the correct ‘Match Type’ If you are unsure which match type to use, please review the documentation on this subject.
- Enter a ‘Goal Value’ for the goal, if applicable. This will not be used for eCommerce goals but should be used in pages such as lead generation forms to give a dollar value to a lead.
click for the full image
Step 9: Configure E-Commerce Tracking
- Ensure the site includes a receipt/thank-you page as this is required by Google to track e-commerce transactions effectively
- On the receipt/thank-you page include the appropriate Javascript code and form specified by Google in the instructions found here: How do I track e-commerce transactions?
- For carts that are on a different domain than the website domain, you will need to use the _link() or _linkByPost() functions to transfer the cookies to the other domain. Each page of the cart should be tagged with the Google Analytics Tracking Code
Step 10: Configure Site Search
You can activate Site Search in the “Analytics Settings>Profile Settings>Edit Profile Information” section for a specific profile. When on the edit profile information page you will then click the “Do Track Site Search” radio button. Next enter the URL Query Parameters. These parameters typically take the form of “?q=mykeyword” or “&search=mykeyword”, so you would enter ‘q’ or ‘search’ in this box. If when performing a search on your site you don’t see any search parameters included in the URL you will need to do some programing on your site to append this information to the URL of the search result pages.
Step 11: Tag Advertising Links
Tag all campaign links that point at your site.
Variables included are:
- campaign : e.g. holiday promo
- medium : e.g. cpc,banner or email
- source : e.g. Google, New York Times, newsletter
- content : e.g. 10% off, 5% off
- term : this is for identifying paid keywords
The first three variables must be included in every tracking URL.
Step 12: Create/Update Privacy Policy
All sites that implement Google Analytics are required to have a privacy policy somewhere on the website (as per Google’s Terms of Service). This policy must indicate that the site uses a cookie to collect anonymous traffic data.
VKI-blog: Google Analytics – Do You Have A Privacy Policy?
Google Analytics Terms Of Service
Step 13: Test on Development Server (whenever possible)
- Test your updates on a development server whenever possible
- After applying the updates, visit the development site to ensure that it continues to function normally
- Log in to Google Analytics and check that the development profile is receiving data (may take up to 24 hours to appear)
- Validate the development site with tools such as WASP (SiteScanGA is another good tool, but the site needs to be indexed in Google for scanning so it’s usually only possible to use this tool on the live site)
Two great tools for helping you with your testing are:
Step 14: Setup Filters
Filters can be a very powerful way of segmenting data. Now that GA has included Advanced Segmentation within the reporting area you can segment data much more easily without having to create as many filters. Some advanced filters that you may still want to use will allow you to match specific transactions with the referring source, medium and keyword that lead to the sale or changing the referrer given credit for the transaction.
Step 15: Implement on live site
- Upload all updated pages to live site
- Visit the live site to ensure that it continues to function normally
- Log in to the Google Analytics and check that the live profile is receiving data (may take up to 24 hours to appear)
- Validate the site with tools such as WASP and SiteScanGA to ensure all pages are tagged properly
Step 16: Review and Update
- Let some traffic start populating the reports for a few days.
- Review filters and goals and update as per your requirements. Be sure to test each filter and goal individually on the test profile before applying to the master profile.
Step 17: Grant Access to Other Users
- Access the user manager and give access to other users that can benefit from seeing your Google Analytics reports. It’s recommended that you give most people per report access. Administrator access should only be granted to people that need to make changes to your Google Analytics configuration.
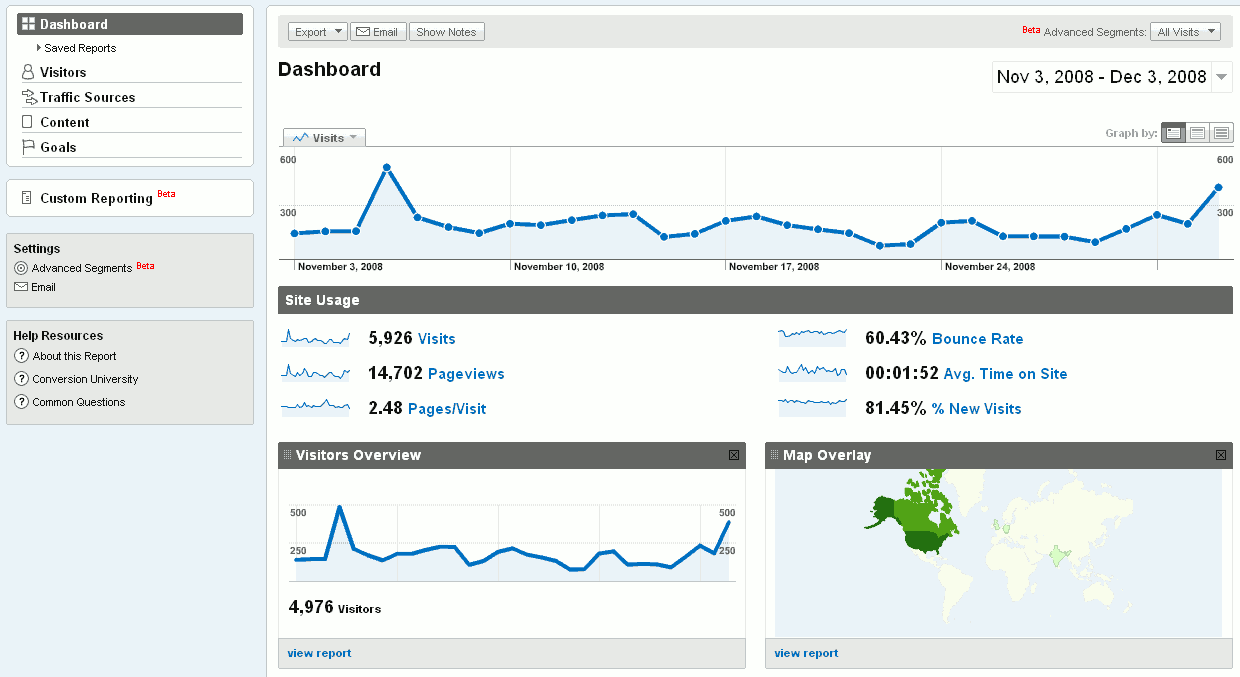
click for the full image
Step 18: Setup Scheduled Reports
- To help make analytics part of your decision making process, we recommend setting up some scheduled reports that outline some of your Key Performance Indicators (KPI). This will help ensure that you are reviewing this data on a regular basis.
If you don’t have Google Analytics setup on your site, and you feel you need some help, contact us about our GA setup service. If you already have GA on your site, but you feel that it isn’t setup properly contact us to learn more about our GA Audit service.
As was mentioned at the top, this is not intended to be an exhaustive list. Any comments are appreciated.


